Fast forward a few weeks. John and I were at a garage sale. He was searching through the record collection, and I was left to wander. I stumbled upon a vintage Salton Yogurt Maker. It was priced at $5. I remembered the goat cheese recipe, and knew I had to have it. We ended up paying $4 for it.

When I brought it home and cleaned it out, I discovered that one of the jars was broken, but a quick google search said that I could replace the jar with an 8 oz canning jar.
To make the goat cheese, you first make yogurt. To make yogurt, you need milk and a yogurt starter. I was off to our local "Natural Food" store, Akins, to see if they carried it. I don't remember how much it cost, but I think it was around $4, and it should make 6 batches of yogurt.

So, crazy... to make goat cheese, you must start with goat's milk. Unfortunately, it was really expensive at Akins. Luckily, I found a local goat farm that was willing to sell me raw goat milk for $5 a gallon (it's only $4 if you bring your own jug).
I thought I finally had all of the supplies I needed. Then, I looked at the recipe again:
Special Equipment needed:
- cooking thermometer
- yogurt maker
- cheesecloth
Preparation instructions (I ended up halving the original recipe, since my yogurt maker only holds about 4 cups):
In a large saucepan, heat milk to 110°, stirring constantly.
Once it reaches temperature, pour milk into a blender, then add yogurt starter.

Blend on high for 10 seconds. Blending the milk removes any clumps that the yogurt starter may form. I'm glad I halved the recipe. I wouldn't have been able to fit twice as much in my blender!

Pour milk into yogurt maker and turn machine on. Leave yogurt in machine for 12 hours, longer is OK too.
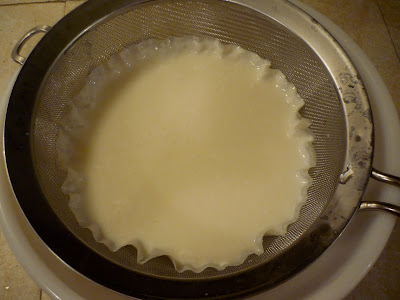
 Line a colander with cheese cloth (or a coffee filter) and place the colander over a bowl. Pour yogurt into cheesecloth lined colander and allow to drain for 8 hours in refrigerator. I actually used 2 fine mesh strainers lined with coffee filters.
After 8 hours, my cheese was still really wet, so I left it a while longer. I ended up draining it almost 24 hours, and it still isn't as dry as I would like it, but that may be because the coffee filter didn't let enough liquid drain through.
Once it's done, transfer to a lidded container. It's really good. Next time I make it (and I will make it again), I will try to find cheesecloth to see if that dries it out more.
My investment of about $12 should make me at least 32 ounces of goat cheese (I froze the rest of the goat milk, and still have enough to make 3 more batches). Have you ever bought goat cheese? I think that's a pretty good deal.
My next project with the yogurt maker: yogurt!!


No comments:
Post a Comment