Thursday, July 22, 2010

Dish Soap

We used to use super-expensive "green" dishwasher detergent. Alas, like I said, it's super-expensive, and there is no room in the budget for expensive, much less super-expensive. I was curious as to whether there was something homemade that I could use.

I found dozens of "recipes" by googling homemade dishwasher soap. They all had some combination of:

Borax
Washing Soda (some actually used baking soda).
(is this reminding you of my laundry detergent?)
Kosher Salt
Citric Acid


The only ingredient that I had to purchase was the citric acid. I was able to find it at a local beer brewing shop. I think this pound was around $10.00, and it should last me a really long time. I've heard of successes either leaving it out, or substituting (brace yourselves...) lemon flavored Kool-Aid. I think I would rather leave it out and see what happened.

Recipe (taped to a container so I never lose it):


I use around 1 tablespoon per load.

Many of these sites suggest using vinegar in place of your rinse aid, but when we did this, we got a huge rust stain draining out of the rinse aid container. I've tried to see why this would happen, but I can't come up with any answers. It doesn't seem like anybody else has had this problem. Maybe my Jet Dry hadn't been used up and there was some strange chemical reaction. Who knows? If you try it and it works, let me know, maybe I'll try again, because Jet Dry is ridiculously expensive if it can be replaced with vinegar!

Wednesday, July 21, 2010

Homemade Vanilla

A few days ago, in my homemade marshmallow post, I wrote that I usually use homemade vanilla in my recipes. I realized that many people may know how to (or even that you can) make vanilla extract at home.

This is something that my mother has done for years. All you need is liquor and vanilla beans. My mom uses vodka, but I prefer the taste of a silver rum. You can't go wrong either way.

Here's what you do:

Buy yourself a bottle of your liquor of choice. Buy whatever size you like. I started with a small bottle (I think it's a pint).


Buy a few vanilla beans. The more you buy, the stronger it will be. I think I started with three.

Take each vanilla bean and split it down the middle, then scrape out the vanilla caviar (the little seeds inside).


Open the bottle of liquor and put in the pods and caviar. Swirl the liquor around, and put the bottle in a dark place. Swirl the vanilla every few days, and after about 3 months, you will have your very own vanilla extract.

Whenever I pour some out, I add enough rum to fill it up again. If you do this, you have never-ending vanilla extract!

Tuesday, July 20, 2010

S'mores Part III: The Payoff

Graham Crackers - check!

Marshmallows - check!

Chocolate - check!

Before you ask: yes, I did consider making my own chocolate.

I even experimented with the idea. With disastrous results. We're talking inedible chocolate. It takes alot to make chocolate bad, but I succeeded.

So, I was forced to settle for this delicious, intense, dark chocolate.

You really didn't expect Hershey's, did you?

Once you have your ingredients gathered, proceed as follows:

Place 2 pieces of marshmallow on each graham cracker (ignore the chocolate under the marshmallow - they are much better if you just broil the marshmallow and allow that heat to sort of soften the chocolate.)

Place under broiler for about 1 minute. Don't close the oven door completely, and watch them very carfully. These go from gooey to burnt in just seconds.

Place a little (or a lot!) bit of chocolate on top of the marshmallow and top with a second graham cracker.


Enjoy!

Monday, July 19, 2010

S'mores Part II: The Marshmallows

You can't have a s'more without marshmallows. And since I've got a craving for s'mores, it's time for homemade marshmallows!

I started my recipe search by looking at my three favorite food websites: The Pioneer Woman Cooks (including her Tasty Kitchen site), Allrecipes.com, and foodnetwork.com. I found recipes on all three, but decided on Alton Brown's recipe from the Food Network Site, partially because I am in awe of Alton Brown, but mostly because the recipe had amazing reviews.

Ingredients:
  • 3 packages unflavored gelatin (NOT JELLO!). The only brand that I've ever seen is Knox.
  • 1 cup ice cold water
  • 1 1/2 cups granulated sugar
  • 1 cup light corn syrup (the next time I make this, I'm going to look for a substitution for this)
  • 1/4 teaspoon kosher salt
  • 1 teaspoon vanilla extract (I always use the real thing - homemade, of course!)
  • 1/4 cup confectioners' sugar
  • 1/4 cup cornstarch
  • Nonstick spray
Process:

Place the gelatin into the bowl of a stand mixer along with 1/2 cup of the water. Have the whisk attachment standing by.

In a small saucepan combine the remaining 1/2 cup water, granulated sugar, corn syrup and salt. Place over medium high heat, cover and allow to cook for 3 to 4 minutes.

At this point, you are going to want to cook it until the mixture reaches 240 degrees F. You can use a regular candy thermometer, but I used this electronic thermometer that allows you to set a temperature target, and it will beep when it gets to that temperature.

Here you can see that my sugar was 97 degrees, and the target temperature was 240.

...getting closer. This will take approximately 7 to 8 minutes. Once the mixture reaches this temperature, immediately remove from the heat.

Turn the mixer on low speed and, while running, slowly pour the sugar syrup down the side of the bowl into the gelatin mixture. Once you have added all of the syrup, increase the speed to high.

Continue to whip until the mixture becomes very thick and is lukewarm, approximately 12 to 15 minutes. Add the vanilla during the last minute of whipping. While the mixture is whipping prepare the pans.

Combine the confectioners' sugar and cornstarch in a small bowl. Lightly spray a 13 by 9-inch metal baking pan with nonstick cooking spray. Add the sugar and cornstarch mixture and move around to completely coat the bottom and sides of the pan. Return the remaining mixture to the bowl for later use.

When the marshmallow mixture is ready, pour into the prepared pan, using a lightly oiled spatula for spreading evenly into the pan.

Dust the top with enough of the remaining sugar and cornstarch mixture to lightly cover. Reserve the rest for later. Allow the marshmallows to sit uncovered for at least 4 hours and up to overnight. I went for overnight, and they set up perfectly.

Turn the marshmallows out onto a cutting board and cut into 1-inch squares using a pizza wheel dusted with the confectioners' sugar mixture.

Once cut, lightly dust all sides of each marshmallow with the remaining mixture, using additional if necessary. Store in an airtight container for up to 3 weeks (as if they'll last that long!)

Next up: finishing the s'mores!


Tuesday, July 13, 2010

S'mores Part I: The Graham Cracker

This actually started from a desire to feed my son good snack food. The fact that it has become the base for the best s'mores ever is a bonus. More on the s'mores later, I promise.

After my (sort of) success making cheese crackers, I thought I'd try a sweeter cracker. He loves graham crackers, but like most processed food, it has HFCS in it, along with all sorts of other undesirable ingredients.

I remembered that I had seen a show on the food network a while ago on how to make graham crackers, so I did a little search and found Alton Brown's recipe for graham crackers. The recipe calls for graham flour. A simple internet search revealed that graham flour is just whole wheat flour. The flour that I found was just labeled as whole wheat, but on the back was printed the story of graham flour.


The other sort of strange ingredient was aluminum free baking powder. I was almost out of baking powder anyways, so I went to the store and picked up this brand, which is pretty widely available.


Luckily, I have a kitchen scale, as Alton tends to give dry measurements in ounces rather than cups. I measured out the flours, baking soda, brown sugar (I used light brown), salt, and cinnamon.


I threw it in my food processor along with the butter. I processed it until the butter was evenly distributed.


I added milk, honey (the recipe calls for molases, but I'm not a big fan of the flavor of molasses, and I knew honey would taste delicious), and vanilla and processed for about a minute. At this point, it holds together in a ball. I pressed the dough into a disk and wrapped it in plastic wrap to put in the fridge for 30 minutes.


After chilling, I rolled the dough out between 2 pieces of parchment paper. I rolled it super thin. Probably about 1/8 of an inch. I didn't want the crackers to be chewy, but crispy.


After rolling, I cut it into about 2 inch squares using a pizza cutter, then pricked each cracker with a fork.


This recipe made a little over 2 pans of graham crackers. The recipe says to bake for 25 minutes, but maybe I rolled them too thin, because mine were ready before 15 minutes. I cut through them again right after they came out of the oven, because I was afraid that they woulnd't break apart. After about 10 minutes, I was able to break them into perfect little squares.


Perfect little yummy squares.

Perfect little yummy bases for s'mores. But more on that later.

Saturday, July 10, 2010

PB & J!

I did a post a while ago about how I made strawberry and blackberry freezer jam. I thought I'd follow it up with my homemade peanut butter recipe.

Let me start by saying that this is NOTHING like Jif, Skippy, or Peter Pan peanut butter. Is much more like the natural peanut butters that you can find at places like Whole Foods. Some of the major brands are also starting to make more natural peanut butter. Before I started making my own, this had been our standard peanut butter for about a year:

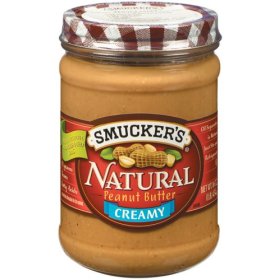
If you're not up to making your own (but trust me, it's easy), I would recommend this one. The only ingredients are peanuts and salt, and it is quite yummy.

But, if you are willing to roll up your sleeves for about 3 minutes, you can make your own for much cheaper. Plus, I like to add just a little sweetener to mine. Sometimes its honey, but this time, we had just a little leftover (real, of course) maple syrup. Delish!

I adapted my recipe from Alton Brown's recipe from www.foodnetwork.com.

I bought plain, raw Spanish peanuts. I tried using the ones in the canister, like Planter's, but they have oil and salt already added, and when I roasted them they burnt really fast. I imagine that you could use already roasted peanuts and just skip to the food processor step. I haven't tried, though . I found the raw Spanish peanuts near the nuts for baking, rather than the snack food aisle.

Dump the peanuts onto a cookie sheet. The first time I did this, I peeled the red skin off the peanuts. It took FOREVER, and made a huge mess. This time, I just left them on, and didn't have a problem. Roast the peanuts in a 350 degree oven for 15 minutes or so.

Let the peanuts cool (I left them for several hours, but I think maybe 3o minutes would suffice). Dump them into a food processor, along with about 1-2 teaspoons salt (this is for about 16 ounces of peanuts). Turn on the food processor and drizzle in some oil. Alton says to use peanut oil, but you only need about 2 tablespoons, and I didn't feel like buying a whole container of oil just for peanut butter, so I used canola oil. I'm sure that any vegetable oil would work. Once it's the consistency you like, stop.

This will never be super creamy peanut butter (like Jif). It will always have just a little peanut texture to it, but we like it that way.

At this point, you can add sweetener. Like I said before, I've used honey and maple syrup, and if John would let me have it in the house (he hates the taste!?!), I would try agave nectar. Run the food processor for a few more seconds to incorporate, and dump it in your container of choice.

The first time I made it, I was worried that Cohen wouldn't eat it, so I just washed out our old Smucker's jar and put some of it in there. Since then, I just put it in whatever container I have clean.

Try it! I'm sure that you'll love it, especially in a PB&J sandwich made with your own freezer jam!

Friday, July 9, 2010

Smells like San Antonio

I love tortillas. Wait... let me rephrase that. I love homemade tortillas. Those cardboard things that they sell at the grocery store are not tortillas. I'm not sure what to call them, but they bear little resemblance to the tortillas that I'm talking about.

When I lived in San Antonio, any Mexican restaurant worth going to made their own tortillas, and you could often watch the process. Then I moved to Oklahoma City - the land of the cardboard "tortillas". One day, a friend said she was going to Ted's. I said, "Ted who?". It turns out, that OKC has the most AMAZING Mexican restaurant called Ted's Escondito. I was thrilled that I could now have yummy Mexican food with real tortillas.

However, since Ted's is very rarely in our budget these days, I decided to look into making my own. Most recipes call for lard. I'm sure these tortillas are delicious, but it just seems so unhealthy. Then I found a recipe that use canola oil in place of lard. They sounded like the place to start.

They're really easy. Only 5 ingredients: flour, canola oil, salt, baking powder, and water.

Mix together 3 cups of flour, 1 teaspoon salt, and 1/2 teaspoon baking powder. Add the canola oil and mix until the mixture looks like fine crumbs. This is messy work - I used my hands, and ended up with more dough on my hands than in the bowl. I scraped the dough back into the bowl and added 1 cup of hot water, and mixed until a ball formed. The recipe said to let rest at least 30 minutes. Now, I've failed at making tortillas in the past, and I think it was because I didn't let the dough rest long enough. So, covered the dough with plastic wrap and put it in the fridge. I intended to make the tortillas about 4 hours later. However, as often happens, plans changed. I didn't have a chance to make the tortillas until about 24 hours later. Oh, well!
I got a tortilla press from my parents earlier this year (thanks, Mom & Dad!)

Their intended purpose is making corn tortillas, but I wanted to try to use it for flour tortillas.


It worked to get the tortillas into a round shape, but I still had to roll them to make them as thin as they need to be. Which is thin. Really, really thin.

Once they're super thin, I put them on a hot skillet. Mine is cast iron.

Flip when it looks like this:

This recipe should make about 12 tortillas. They're good with anything. Tonight we had them with fajitas. My favorite is one fresh out of the skillet with butter, dipped in salsa. Yum!

Thursday, July 8, 2010

This one's for my Dad

Apparently my dad reads my blog. He called me the other day and made a request: he wanted me to make Lorna Doone Cookies. Since we're going to meet my parents in Branson this Sunday, I thought I'd give it a try.
A quick Google let me know that they're a type of shortbread cookie. I haven't had them in quite a while, so I decided to just find a shortbread recipe that looked good and see what I came up with. I decided on the simplest type of shortbread, which only has 3 ingredients: flour, sugar, and butter (but you could possibly count butter as 2 ingredients, since it calls for an entire pound of butter!). The only decision that I had to make was whether to use white or brown sugar. I thought that brown sugar would add a nice richness, so I gathered my ingredients:


I creamed 2 cups of butter with 1 cup packed brown sugar, scraping down the sides as necessary.


Next, I added 4 1/2 cups of flour, about 1 cup at a time, and beat until light and fluffy. At this point, I dumped about 1/3 of the mixture on some parchment paper and rolled to about 1/2 inch thickness. I cut the scraps away with a pizza cutter and cut the dough into about 1 by 3 inch rectangles.


I poked each rectangle with a fork,

and put them in the oven for about 20 minutes. At this point, they were almost done, but I could tell that they were going to stick together, so I used the pizza cutter again to re-cut the rectangles and put them back in the oven for 5 more minutes.

For my second batch, I thought I'd try separating the rectangles before baking. This was way more trouble than it was worth. I also differed the fork pattern, just for variety.


I was not quite as accurate with my sizing of the cookies on this batch. The little ones burned a little, and the big ones were slightly underdone.

I'm not sure if they're Lorna Doones ( I'll have to wait until dad tries them to see if they fit the bill), but they are really delicious!

Sunday, July 4, 2010

And still more blackberries...


This morning after church, we had an all-church potluck. I didn't remember this until I woke up this morning and checked my Facebook page, and the church posted a reminder about said potluck. According to the first letter of my last name, I was to bring a dessert (I'm always upset when it works out that I have to bring a side - desserts are my forte). So at 7:30 this morning, I had the task of figuring out what wonderful dessert I would take. Remembering the 2+ pounds of blackberries in my freezer (see previous post), I decided to make a blackberry cobbler recipe that I had printed off from The Pioneer Woman.

It is a really simple recipe. Self-rising flour, sugar, milk, butter, and blackberries. Upon examining my pantry, I discovered that I didn't have self-rising flour, and I had given my son the last of our milk last night before bed. I did however, have heavy cream, and the I was able to find a way to make self-rising flour out of all-purpose. (To make self-rising flour, for every cup of flour needed, add 1 1/2 teaspoons of baking powder and 1/2 teaspoon salt)

Mix 1 cup self-rising flour, 1 cup sugar (I accidentally added 1 1/4 cups), and 1 cup milk (or heavy cream in my case). Stir in 1 stick of melted butter. I then poured the batter into a greased 8 by 8 casserole. Then, 2 cups of frozen blackberries were sprinkled over the top. At this point, you are supposed to sprinkle 1/4 cup of sugar over the whole thing, but I had already added it to the batter - oh, well! Bake at 350 for 50 minutes, then sprinkle more sugar on top and bake 10 more minutes.

Fast forward about 5 hours, when I was getting ready to leave the potluck. I went to the dessert table to pick up my dish, which looked like it had been licked clean, and as I was walking out the door, I was accosted by an elderly woman. She informed me that she and her daughter had been watching my dish to see who would pick it up. She said that her daughter had to have my recipe. I laughed, and went over to meet her daughter, and wrote down my recipe. She said that her entire table had been talking about my cobbler.

I decided that I would make it again for my in-laws. We drove down to their house this afternoon, and I made it for dessert after our yummy dinner of hamburgers and baked beans. It is currently sitting in the kitchen, waiting for us to be hungry enough to devour it.


Friday, July 2, 2010

Ketchup, A.K.A. my son's favorite food

My son will put ketchup on anything. Last night, we fed him a hot dog and peanuts for dinner (among other things). He not only dipped his hot dog, but also his peanuts, into the last of the organic ketchup that we had on hand.
We buy organic not because tomatoes have to be organic (we have a list of the fruits and veggies that need to be organic, and those that conventional is just fine). We buy organic ketchup because, it is the only ketchup that does not have HFCS (high fructose corn syrup) in it. (Although I just saw a non-organic brand that says right on the label that it is HFCS free - I don't remember the brand). We try as best as we can to keep it out of our house. Occasionally, it slips in, but for the most part, we are HFCS haters.
Organic Ketchup is expensive, as is most organic food. I vowed that as soon as we ran out of it, I would try to concoct my own HFCF-free stuff. I sputtered out the last of our Ketchup last night, and, as I'm fairly certain that we could not go a day without the stuff, I experimented and made some last night.
Naturally, I had done my research. A google search for "homemade ketchup" yielded many methods for making your own ketchup. They ran the gamut from growing your own tomatoes and cooking them down, to buying tomato sauce and doctoring it up. I decided upon a method that starts with tomato paste. Here's what I did:

I gathered together:
tomato paste -organic does taste better,
but I almost went with hunt's brand.

vinegar (yes, we buy vinegar in bulk - there's very little
that a little vinegar or baking soda won't clean)

brown sugar

and various spices I thought would work

I threw it all in a bowl, mixed, and added some water for the right consistency. I ended putting too much brown sugar in, so I had to overcompensate by adding more vinegar. I ended up adding red wine vinegar, white vinegar, and also rice wine vinegar before I was happy with the level of acidity and sweetness. I bottled it up and put it in the fridge overnight.

This morning, I tried it to see how the flavors had melded and was not really happy. I dumped it back into a bowl and added onion powder and a little sriracha for a little heat.


It turned out super complex and yummy. Not so yummy that I'd be willing to dip my peanuts in it, but definitely worthy of some french fries.